BINedit Simple 2D Models
Simple 2D Models
(Adding Verticies)
Before you click "add" you must ask yourself where you want these verticies to appear.
|
Note: now is as good a time as any to get yourself
some graph paper and start forming the habit of plotting coordinates before
you even open the BinEdit program.
|
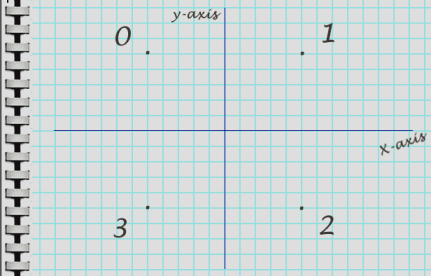
So, getting out our notebook, we rough in four points (three if you
want a triangle). Undoubtedly, your models will have many possible
shapes and sizes, but for our example, we will create a small, simple square
that's 1000 editor units wide and 1000 editor units tall, and that is centered
on the (x,y) axis. Like this:
|
Note : the scale used here is 1 graph paper square
= 100 editor units. The total span in each direction is 1000 editor
units (100x10).
|
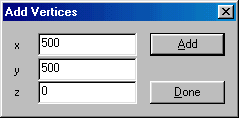
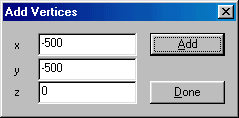
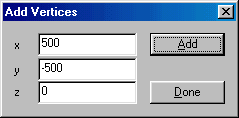
So, in editor units, our vertex coordinates (x,y,z) will be as follows:
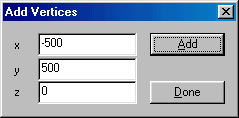
Vertex 0 = (-500,500,0)
Vertex 1 = (500,500,0)
Vertex 2 = (500,-500,0)
Vertex 3 = (-500,-500,0)
|
Explanation: All verticies above the x-axis are
positive values, all verticies below the x-axis are negative values.
All verticies to the right of the y-axis are positive, all verticies to
the left of the y-axis are negative. All z values are zero because
this model will have no depth; it is a flat model.
|
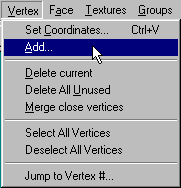
Now that we know the coordinates we will be using, goto Vertex>Add
The add vertex box will come up:
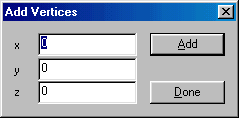
Now enter the values for each of the verticies you want to add (one
at a time). In our case it will be as follows.
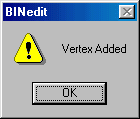
After each addition, you will be prompted for confirmation.
Click Ok, and move to the next vertex. When everything is complete, click done.
Although you cannot really see them, the verticies you defined are now
added and available for use in BinEdit.
|
Note : if you absolutely must see your new vertices,
activate "View>Show vertices in 3D view", then goto Vertex>Select All Vertices,
and finally, if they are still not in view, click on "fit" or use "View>Zoom
to fit". The vertices should be visible as small spheres (Oliver Pieper).
|
|